

Creating a Google Maps API Key
Step 1: Navigate to the Google Map Platform and click Get Start button.
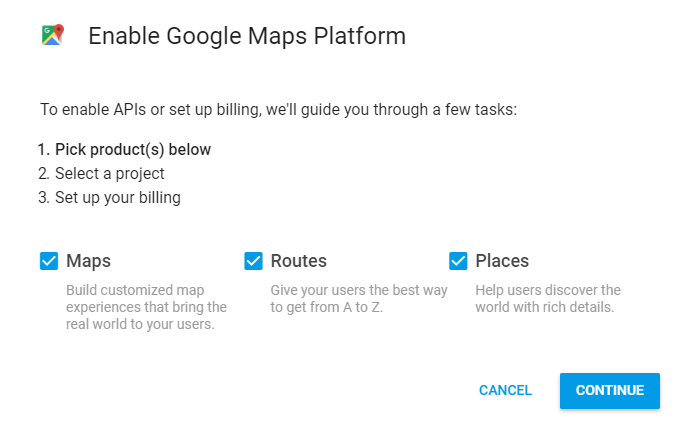
Step 2: Enable Google Maps Platform by selecting the Maps, Routes, and Places check boxes and hit Continue.
Step 3: If this is the first time you create an API Key, you will create a Project first.
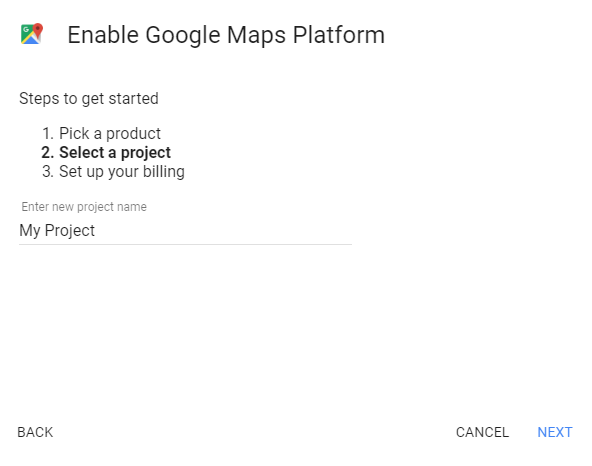
Name your project then click Next button.
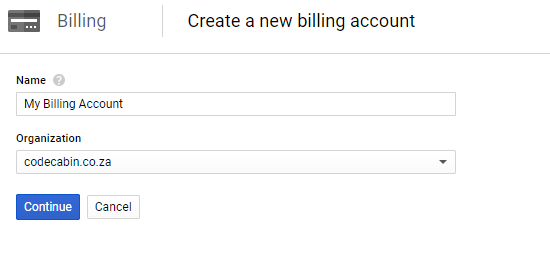
Step 4: Wait for the billing prompt and click Create Billing Account.

Name your Billing Account and Organization then hit Continue. Then select your country and hit Confirm
Select your country and hit Confirm.

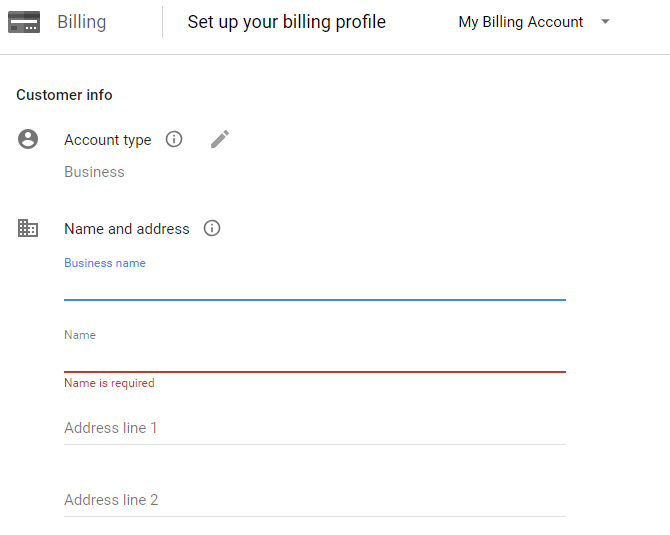
Enter your customer info and card information.
Hit Submit and enable billing.
Note: You will get up to 28,000 map requests per month and 40,000 direction call per month for free. You will only be billed when your usage exceeds your monthly $200 credit limit.
When your billing has been set-up, you can move onto creating API Key.
Step 5: Hit Credentials option on the API manager menu in the right sidebar.
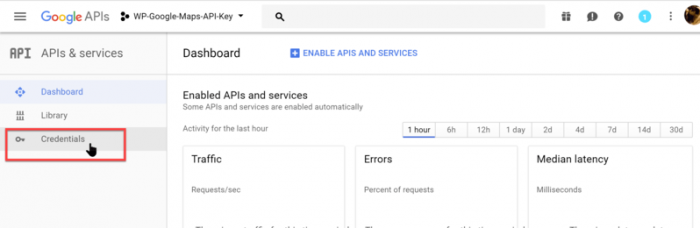
Hit Create Credentials.

Click on API Key on the pop-up window and copy the generated API key to your clipboard.

Step 6: Log in your WordPress back-end. Navigate Appearance >> Advance >> Advance. Then paste API key to Google API Key box. Hit Publish.

Step 7: Back to Google API Manager. You will want to restrict access to your API Key to avoid having it “ hacked” and going over your quota. Click Restrict Key.

Select HTTP referrers (web sites) and enter the following domains under Accept requests from these HTTP referrers (web sites) replacing yourdomain.com with your domain name:
| *.domain.com/* |
| *domain.com/* |

Click Save button.
Step 8: To enable the required API functions to your project, click Library link in the API Manager sidebar menu. Hit Google Maps JavaScript API panel.
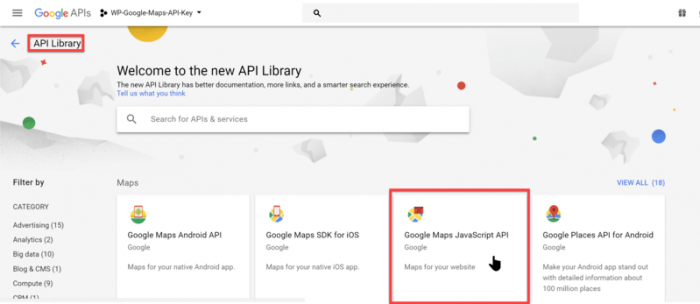
The JavaScript API will probably already be enabled. If the JavaScript API is not enable, then click Enable button on the Google Maps Javascript API window.

Sometimes, Google does not activate all the required APIs and you may have to manually enable these APIs. The following is a quick list of all the APIs that need to be enabled along with your JavaScript API:
- Google Maps JavaScript API
- Google Maps Geocoding API
- Google Places API
- Google Maps Directions API
- Google Maps Distance Matrix API
- Google Street View Image API